Getty Images/iStockphoto
Try this AWS Proton tutorial to build templates quickly
AWS Proton enables IT admins to create templates for environments and the services that live in them. Follow this tutorial and learn to do both.

AWS Proton is an automated application delivery service primarily focused on containers and serverless workloads. The tool enables platform teams to enforce controls and best practices on the underlying infrastructure and technology stack with templates.
AWS Proton provides all the benefits of infrastructure as code, CI/CD and monitoring, while providing an efficient way to deploy containerized and serverless applications via preapproved environment and service templates. These templates can replicate easily across development, staging and production environments.
Development teams can use Proton to ship services faster by focusing only on code, rather than the underlying infrastructure deployments and management overhead. Teams can use AWS Proton through the AWS Management Console, Boto3 -- the AWS SDK for Python -- and the AWS CLI to start service deployments.
How does it work?
To understand how AWS Proton works, we must understand the perspective of various use cases mentioned below. But the goal remains the same across the board: to enable users to create environment and service templates that are easy, fast and safe to deploy to multiple environments with minimum overhead.
Platform teams and administrators
AWS Proton enables platform teams to define and publish environment templates, which AWS Proton then consumes to create environments replicable via those templates. The tool also enables platform teams to create service templates that are compatible with environment templates and define CI/CD.
This process enables admins and platform teams to create standardized, versioned infrastructure templates to enforce guardrails on the tech stack and best practices. At the same time, it balances controls and flexibility to enable developers to focus on code and development.
Developer teams
From here onward, developer teams can choose one of the published service templates and connect their source code repository to create a service. AWS Proton deploys the source code as service instances and manages the overall service.
Thus, developers can set up continuous integration with their source code repository, likely from providers such as BitBucket and GitHub; AWS deployments are completely automated or part of a continuous delivery pipeline without leaving the AWS portal.
Deploying a Node.js application using AWS Proton
Let's use a simple Node.js containerized application for this AWS Proton tutorial to explore how it works and some of the important concepts.
This application uses a minimalistic web framework called Express.js to deploy a simple web service, which is then containerized using Docker.
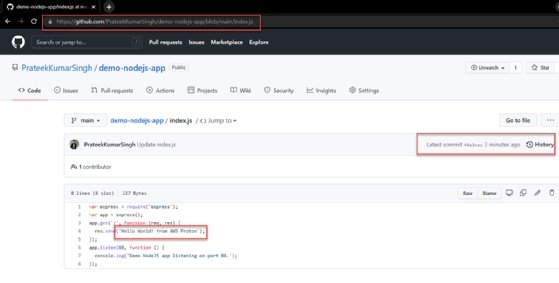
Find the index.js file in this GitHub repository, which has the Node.js code and the Dockerfile to build containers. Please fork this repository to use the code in this AWS Proton tutorial.
Create account role for CI/CD pipeline
- Log into the AWS Proton Console.
- Click Account Settings under the hamburger menu on the left, and then click Configure.
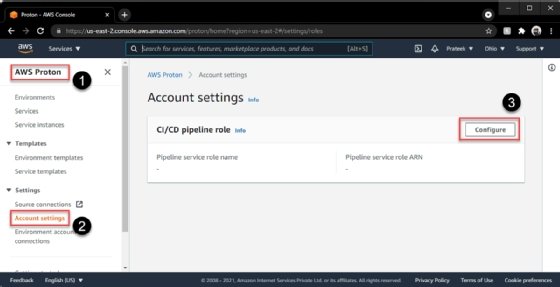
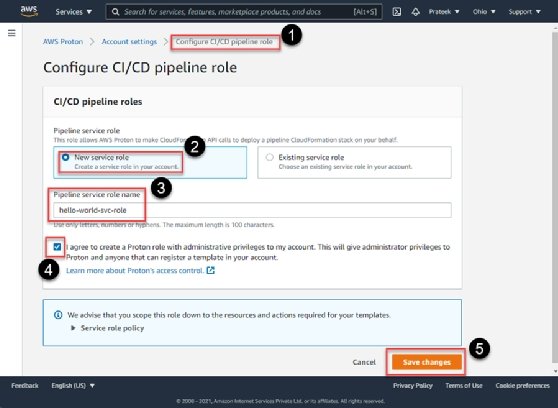
- Under Configure CI/CD pipeline role, the New service role radio button is enabled by default. Please provide an appropriate role name and check the I Agree box.
- Save these changes to configure an account role for the CI/CD pipeline.
Create an environment template
- From the AWS Proton Console's left sidebar, under the Templates drop-down menu, choose the Environment templates menu.
- Click the Create environment template button.
- From the Create environment template screen, choose Create a template for provisioning new environments under the Template options section.
- Choose Environment for deploying web services that run on Fargate under the Sample template bundle source section.
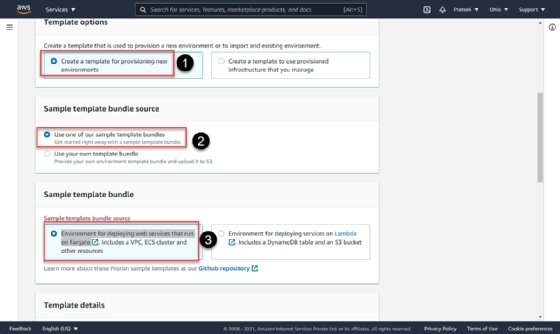
- On the same page, provide a template name and create the environment template. Create an environment template called hello-world-env-template. Select the template version 1.0 and click on Publish.
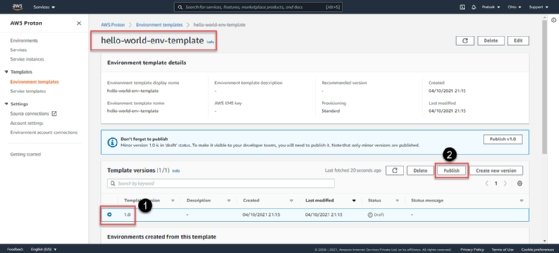
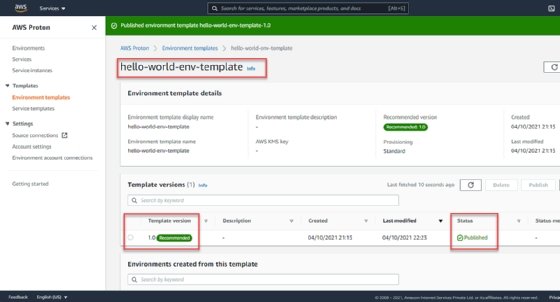
These steps publish the first version of the environment template, as demonstrated in Figure 5.
Create a service template
- In the left sidebar of the AWS Proton Console, under the Templates drop-down, choose the Service templates menu. Then click on Create a service template.

- From the Create a service template page, choose Use one of our sample template bundles under the Sample template bundle source section, and A web service on Fargate via the Sample template bundle radio button.
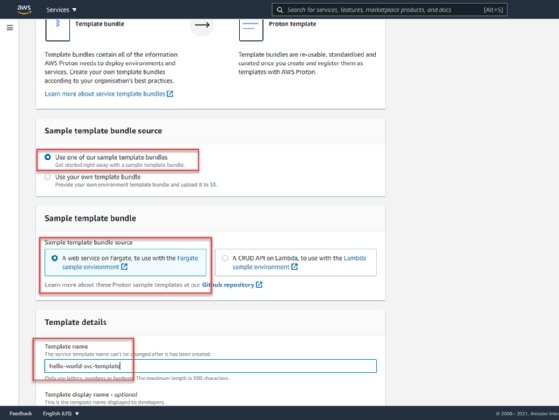
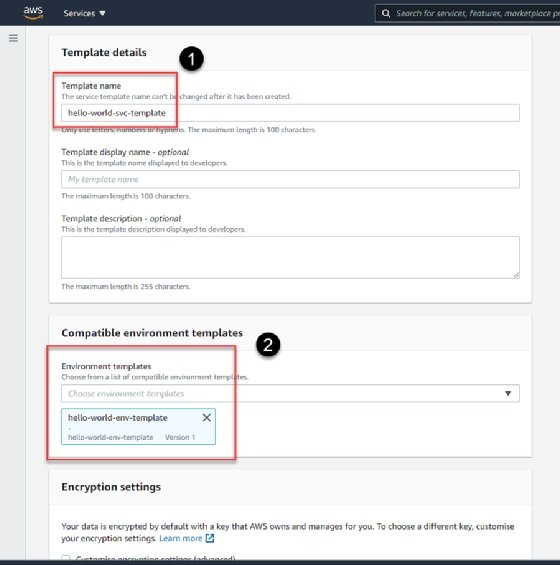
- Provide a name for the template and choose from the drop-down the environment template created in the previous subsection. Click Create a service template to deploy it.
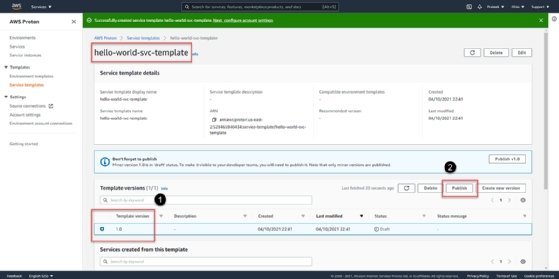
- Once the service template is created, don't forget to select Template version 1.0 and click the Publish button. This step publishes the service template in a few seconds and enables users to validate that "published" status on the landing page.
Create an environment
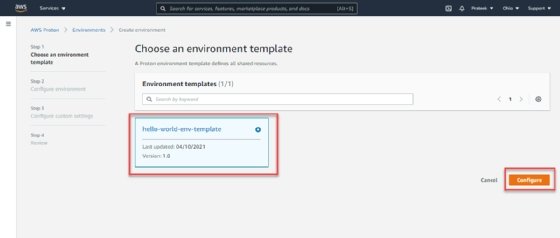
- From the left sidebar, select Environments and then select Create environment. Choose the environment template created in one of the previous subsections and click Configure.
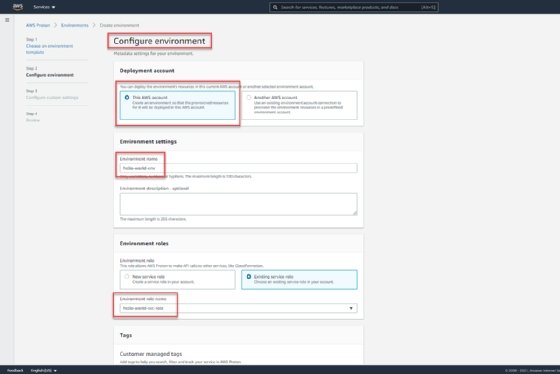
- To configure your environment, provide an environment name. Choose one of the existing service roles created in the first subsection and click the Next button.
- Click Next again and then Create to spin up an environment.
Create a service and service instance
- Now that we have created an environment, let's go to the sidebar and choose the Services menu. Select Create service.
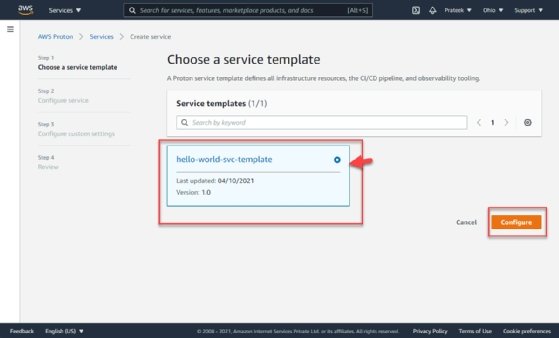
- Select the service template we just created and configure it on this screen.
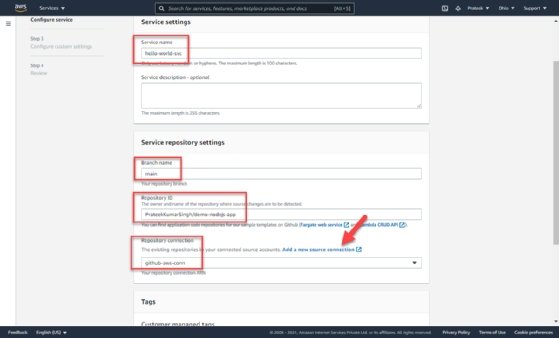
- To configure your service, provide a service name under Service Settings. Under the Service repository settings menu, fill in the information for Branch name, Repository ID and Repository connection -- this source code will connect to the demo Node.js repository on GitHub used for this AWS Proton tutorial. If you have not created a repository connection already, add a new source connection using the URL highlighted in Figure 13 to set one up.
- Clicking on the Next button takes you to set up new service instances. Provide a unique name and select the newly created environment. There are some optional inputs in this page as well, which you can fill in as per your individual requirements.
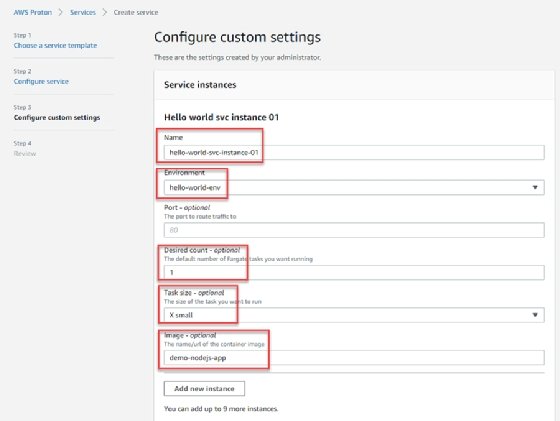
- We will leave the Dockerfile listed under Pipeline inputs, which is the default value as mentioned above. Click on the Next and then Create buttons to create service instances.
Verify the service deployment and CI/CD
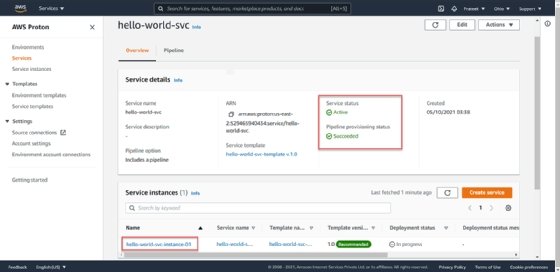
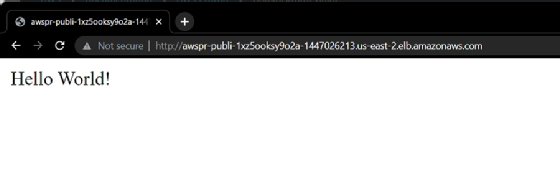
- Service endpoint creation takes a while to complete, but when you see Service status listed as "Active" and Provisioning status as "Successful," open up the service instance screen.
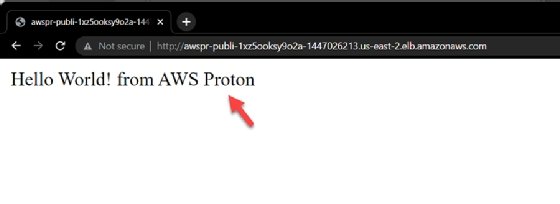
On the service instance page, under the "Outputs" section, you will see "ServiceEndpoint."
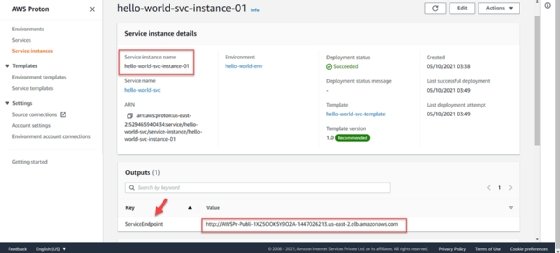
- Copy and paste this value into the URL bar in your web browser. You should see the Node.js Hello World application, as demonstrated in Figure 17.
- To validate if CI/CD is functional, I modified your index.js file in the GitHub repository, which will trigger a new build and deployment.
- Once deployment is complete -- and it might take a few minutes -- you can verify completion by refreshing the service endpoint in your browser, as demonstrated in Figure 19.