
pixel - Fotolia
How to create PowerShell modules with a Plaster template
Follow along this tutorial to create templates in Plaster, an open source tool, and accelerate the development of PowerShell modules.

The creation of PowerShell modules is a much more developer-like experience compared to how IT professionals traditionally create scripts. To streamline the process to build modules, consider an open source tool called Plaster.
A PowerShell module is a set of related PowerShell functions. A module can be a single extension.psm1 file, but it's better to split a module into parts, as this enables admins or developers to more easily change those parts for future use -- which is especially valuable if the module is meant for a repository, such as PowerShell Gallery. PowerShell developers often add other files, such as Pester tests, change logs, readme.md files and license files, into consumable modules.
Many developers use Plaster, which is actually a PowerShell module itself, to create modules. Plaster uses templates and a scaffolding design for module development. The maintenance of one or multiple module templates with files, tests and data already established significantly speeds up development. The use of Plaster -- which is maintained under the PowerShell open source project in GitHub -- is fairly simple, as well.
Here, we'll walk through how to create and maintain a Plaster template, using a few cmdlets and a manifest in XML for the logic.
Create a Plaster template
First, install the Plaster module. In the PowerShell Gallery, enter:
PS C:\> Install-Module Plaster
A Plaster manifest is an XML file that shows what's in a template. A manifest has three sections: template metadata, parameters that outline what users need to know to create a module and template contents, such as files and folders.
To create a template from scratch, use the cmdlet New-PlasterManifest. Below, you see a PowerShell hash table that includes the essential parameters to create the template, such as path, title and name.
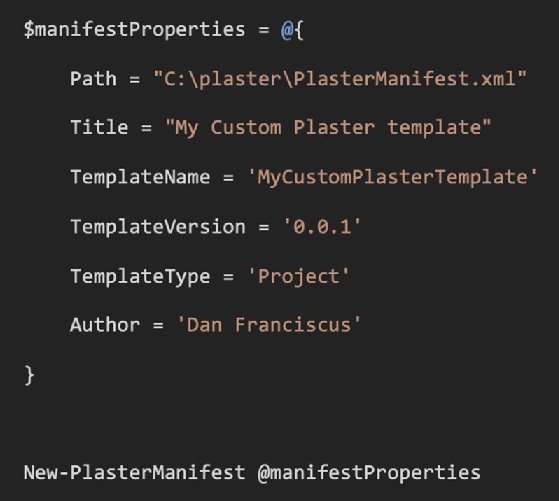
Open the manifest we just created -- PlasterManifest.xml -- to see the options we chose.
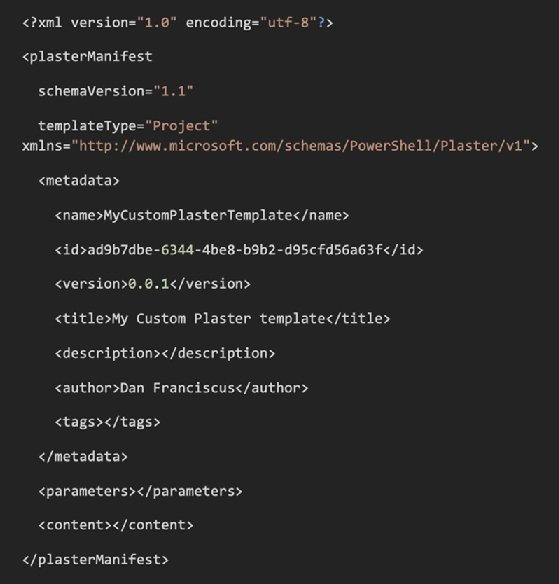
Note that there are no parameters or content in our manifest; this happens by default when you create a Plaster template from scratch. To demonstrate the use of parameters and content, I will use a Plaster template created by Kieran Jacobsen, Microsoft MVP and head of IT at consulting firm Telstra Purple. I cloned the template on GitHub.
Jacobsen's manifest includes prompts for information, such as author name, module name, module version and folders.
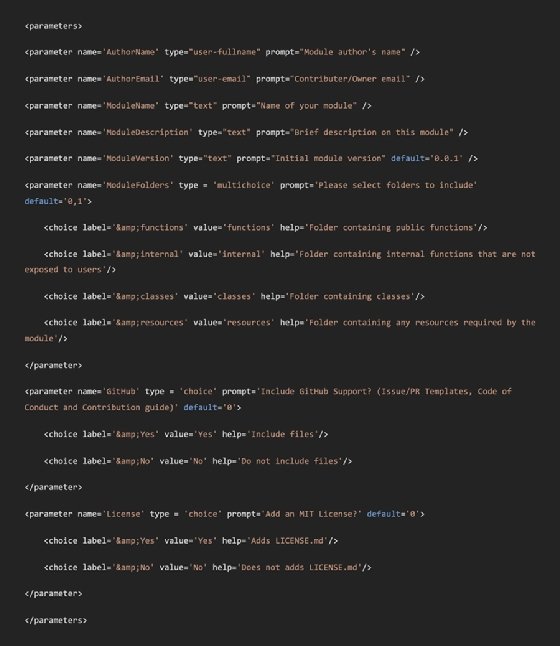
It's possible to give multiple options for a prompt. For example, the "ModuleFolders" prompt lets the user choose multiple folders to include in a new module.
In the content for this manifest, we see some tests stored in the "tests" directory.
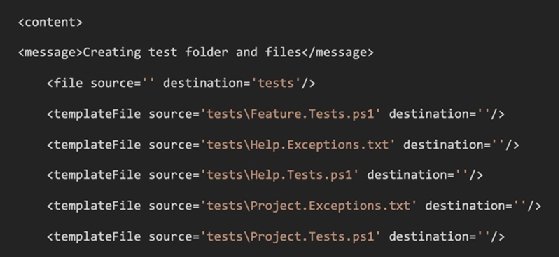
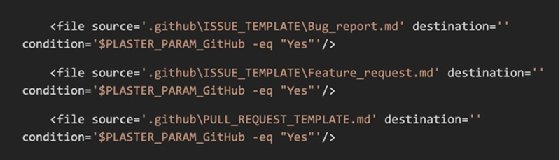
With Plaster, admins can create Pester tests automatically for every new module. As shown in the manifest below, it's also possible to create issue templates for bug reports, feature requests and pull requests in GitHub.
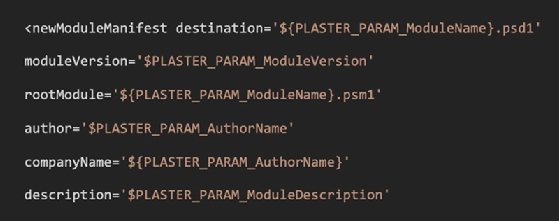
Be sure to put data into the module manifest for new modules. The module version, author and description are included below.
Create a module from a template
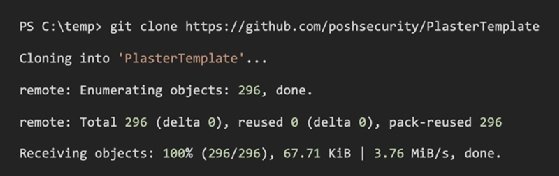
Now that we have a template from which to create future PowerShell modules, we can test it. To follow along, use Git to clone Jacobsen's repository to your local machine.
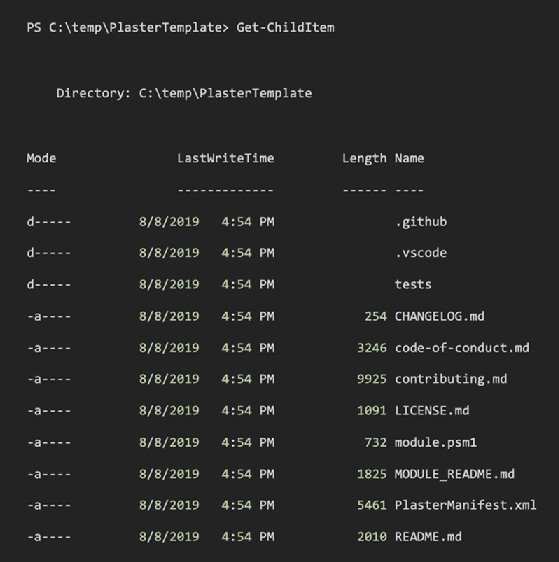
Next, view the Plaster template, and notice all the options from which you can build modules.
Next, create a new PowerShell module based on this template. To get started, use splatting -- a way to pass a group of parameter values to a command as a single unit -- in PowerShell.
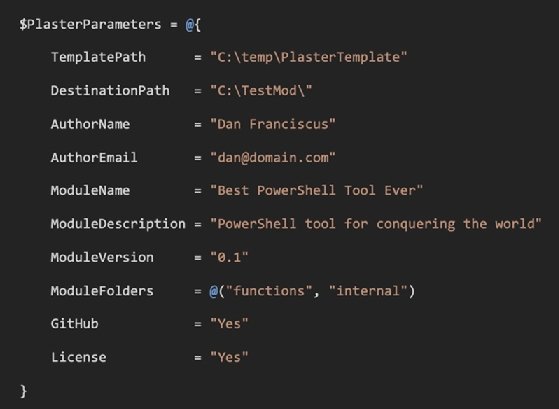
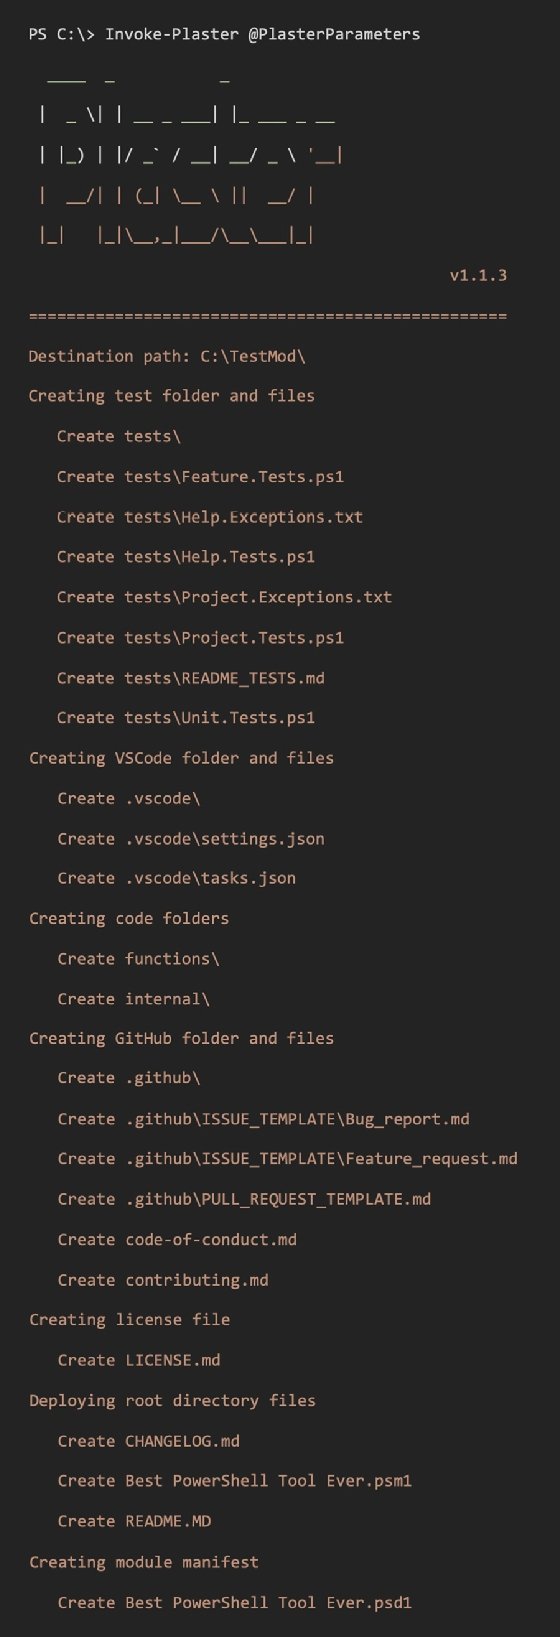
Finally, use the Invoke-Plaster cmdlet to create a module named, for example, "Best PowerShell Tool Ever."
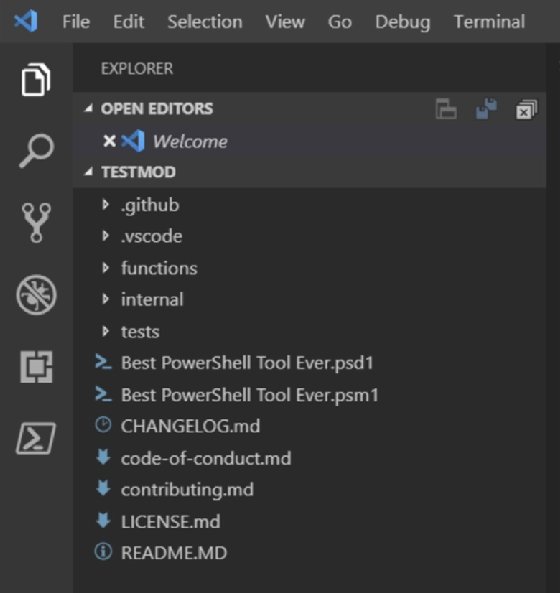
Now, files for the new module are ready. Open the "TESTMOD" folder in Visual Studio Code to see all the files we just created.
Dig Deeper on Systems automation and orchestration
-
![]()
What is PowerShell and how to use it: The ultimate tutorial
By: Stephen Bigelow
-
![]()
How to perform Azure AD bulk operations with PowerShell
By: Mike Kanakos
-
![]()
Why you should consider an upgrade from PowerShell 5.1 to 7
By: Adam Bertram
-
![]()
Automate these DevOps tasks for maximum productivity
By: Anthony Howell